
Here are the steps that I followed to create my custom chassis out of .06" thick sheet aluminum.
The first step, I covered the aluminum with a plastic film. I then used a Laser engraving machine to etch the the layout of my chassis. This is the Design that I created using Corel Draw.

Click on picture to enlarge.
Next I used a hydraulic sheet metal shear to trim the excess from the chassis.

Click on picture to enlarge.
Video to cutting the aluminum sheet. http://youtu.be/1Ygo9pGh4QY
Next I used a tool called a Corner Notcher/Shear. This makes easy work of cutting consistent corners out of all 4 corners.
Next I used a tool called a Corner Notcher/Shear. This makes easy work of cutting consistent corners out of all 4 corners.
 Click on picture to enlarge.
Video of cutting a corner out of the sheet. http://www.youtube.com/watch?v=XhqGUgzqwFs

Click on picture to enlarge.
Video of center punching some holes. http://www.youtube.com/watch?v=upeWqq--0Fg
These dimples/craters in the sheet are needed to getting the Turret Hole Punch perfectly aligned so that the hole is created right where it should be created. I went ahead an etched what the hole size is so I don't mess up and punch out the wrong size hole.

Click on picture to enlarge.
Used a nice Turret Press to create the precision holes for all of the components of the chassis.
 Click on picture to enlarge.
Video of selecting a different Hole Punch. There are a bunch of different sizes. Just pull the locking lever, rotate the top and bottom to the desired hole size.

Click on picture to enlarge.
Each punch has a protruding point. Since the sheet has dimples where I center punched for the center of each hole. Simply put the sheet under the punch. When the pint sticks into the dimple you are perfectly aligned.
Video of punching a hole. http://www.youtube.com/watch?v=MYyekeb9Jno
Video of punching a hole. http://www.youtube.com/watch?v=MYyekeb9Jno
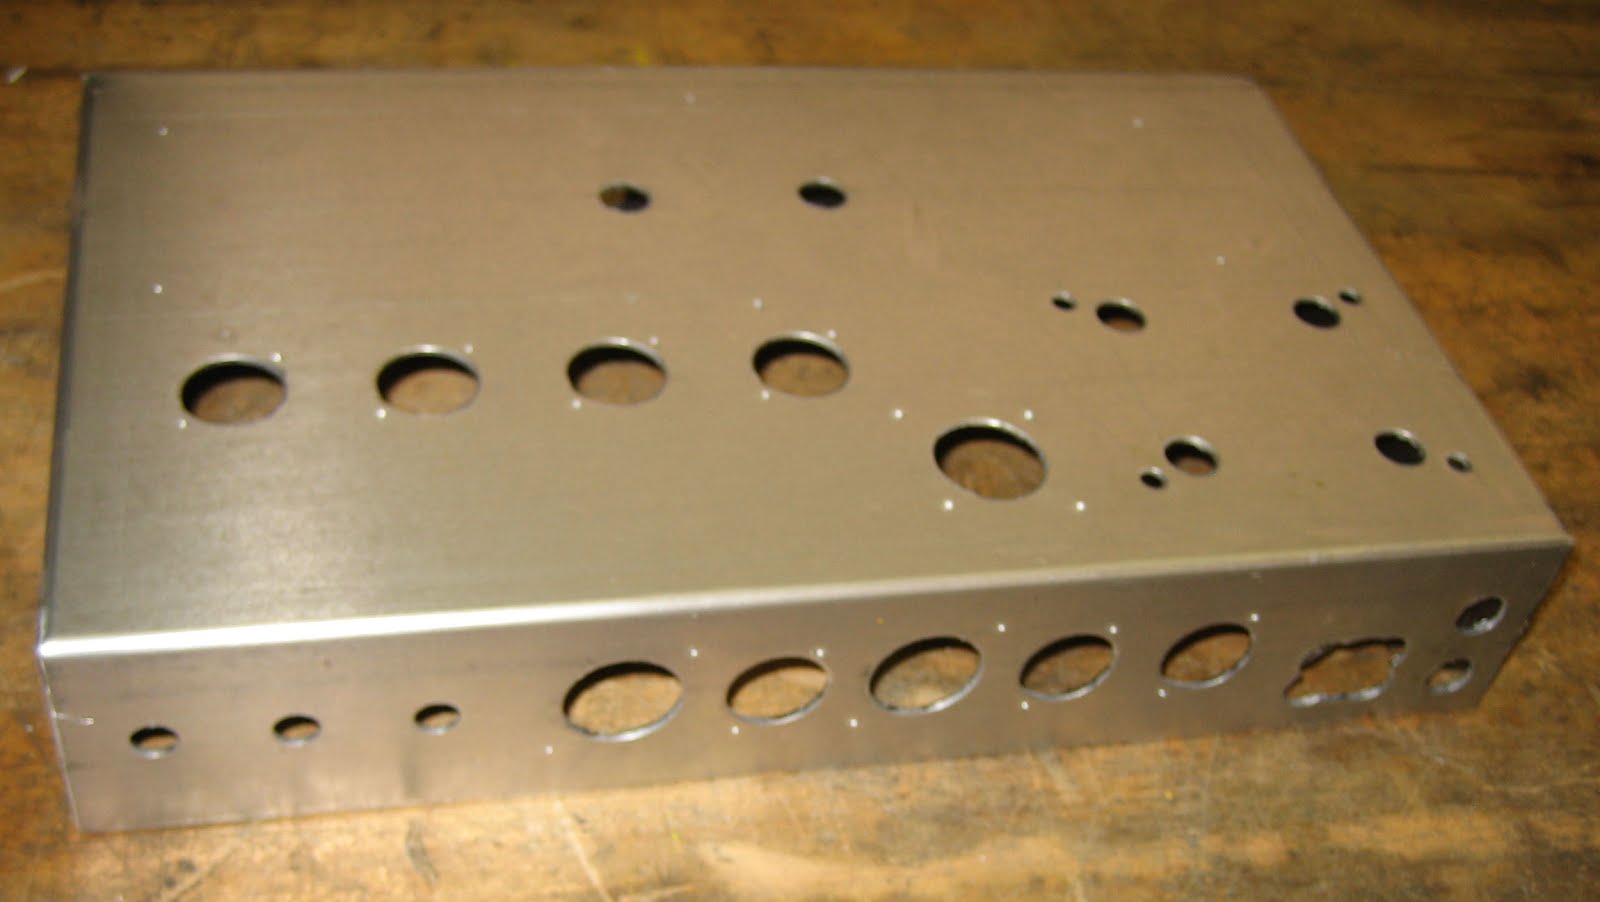
This is what the chassis looks like at this point. All four corners are notched to make it possible to fold up the sides to make a box. All the large holes are punched. For the little holes I'll just drill those later.

Click on picture to enlarge.
Here is a sheet metal Brake. This tool allows you to bend the sides up to make the box.
It's really effortless, That big yellow counter-weight makes the machine perfectly balanced.

Click on picture to enlarge.
Here is a video of using this Sheet Metal Brake to bend up a one of the 4 sides. http://www.youtube.com/watch?v=1Ygo9pGh4QY
Close-up of a side bent up a few degrees.
Close-up of a side bent up a few degrees.
 Click on picture to enlarge.
Here is the semi-finished Combo Chassis. The nearest part is the bottom most of the amp.
From Left to right
3 Speaker output Jacks (4 ohm, 8 ohm, 16 ohm)
1 EL-84 Tube Socket,
1 6V6 Tube Socket
1 EL-84 Tube Socket,
1 6V6 Tube Socket,
1 EZ81 Tube Socket,
AC Power,
2 Fuses (1 AC, and 1 High Voltage)
 Click on picture to enlarge.
From Left to Right The holes in the Top are for:
Power Transformer,
Capacitor Can,
4-Pre Amp Tube Sockets
Output Transformer.
The Font or top of the chassis is for all of the volume & tone controls, Guitar Input Jacks and Power Switches.

Click on picture to enlarge.