Apr 22, 2012

Full Metal Jacket (Lunchbox amp cont.)

Lunchboxes are metal, so this Lunchbox amp that I'm building will be no different.
I cutout the 0.032" thick Aluminum sheet on the hydraulic shear. Now comes the fun part. Making the 4 bends. My wood part has 0.5" radius rounded corners. I started by taping the sheet onto the flat long side using some masking tape so that it would stay put and stay square.

One down 3 more to go. This was quite a workout bending shaping the metal to get a nice matching round radius.


Number 2, that was even harder. The length is very critical. I found that it wasn't as easy as just making bend like the first one. The bend has to start at the right spot. It took me a while and a lot of hammering and massaging to creep up on the right location for the 2nd. bend to start.


I got lucky on the 3rd bend. Whew! All the time I was checking to make sure it wasn't starting to skew. So far so good, it's lying totally flat on the table.


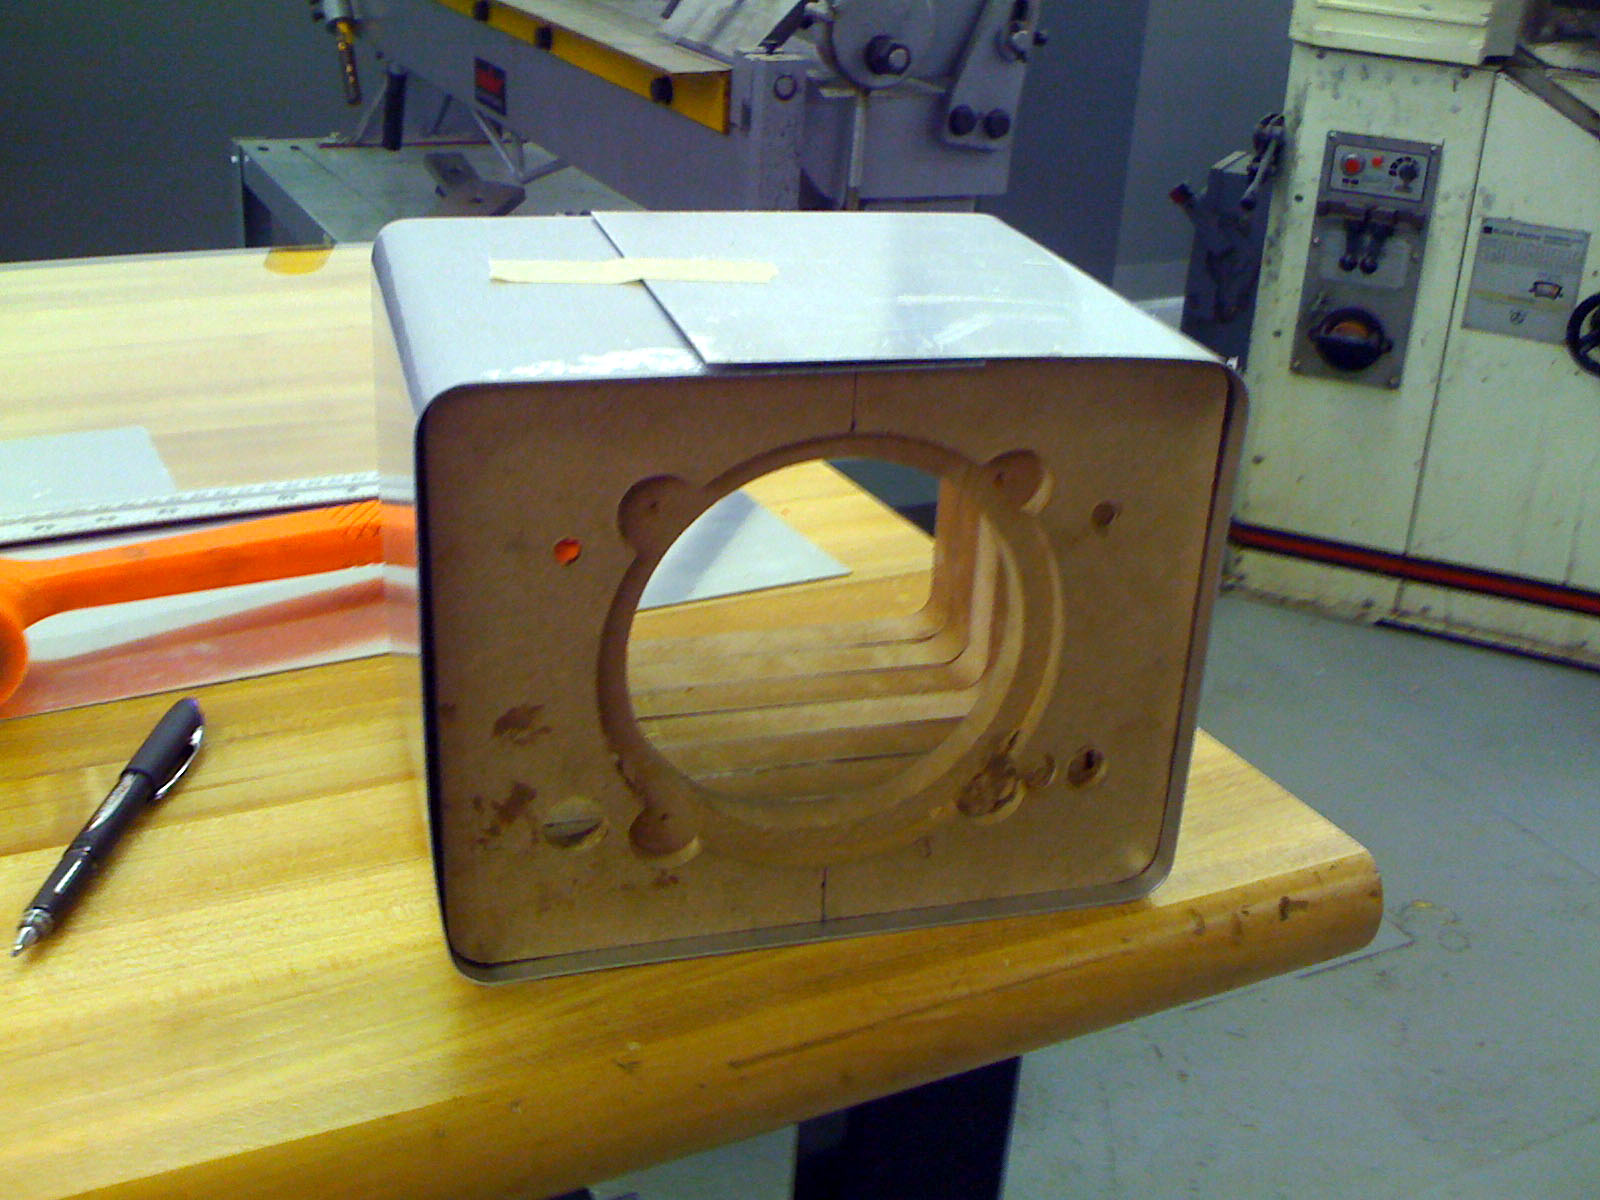
All done. When I started I was going to cut it in the middle and then butt each end up against each other. In the end I didn't mind the look of the overlapping sheet. It will be much stronger like this and will simplify attaching it using a few screws.

It's upside down in the picture, the seam will be on the bottom.

Lunchbox Amp 1 watt continued

I'm using the LASER etcher to mark where I need to cut and punch holes in Lunchbox Chassis ver 2.0. The laser isn't powerful enough to etch the aluminum, so I simply attach some masking paper onto the face. The laser then burns the tape where I need to cut.


It's only accurate to about a thousandths of an inch. My accuracy is a little little less than that, never could color within the lines.

Here's the sheet ready to be cut. I put a box cutter in the pic to give it scale.
Tiny amp chassis it will become.


Love the hydraulic 4 foot wide metal shear. My piece barely fit.


Version 2 completed. after I started adding parts I found out that two parts would interfere with each other. To the recycle bin this one went. Back to the Laser for version 3.


Here's version 3 prior to bending it into a box shape. Origami with sheet metal! While I was at it I decided to tweak some other stuff.


For the front of the lunchbox amp I decided to use perforated aluminum as a speaker grill. Here I just finished painting it gloss Black.


I then made a vinyl decal. I drew some centering marks so that it would be centered in the grill.


This vinyl decal I'm using as high-tech masking tape.


Peeling away the front part of the decal.


Where you see light coming through I plan on shooting with white paint. The Black Vinyl decal will mask the image.


After a coat of white.


Well that didn't work. Pulling the black decal removed the black paint that it was masking.


It's all good though. I thought of even better idea. I would paint the front black. I then would put the decal on the back side and shoot the backside white. This way there was no paint for the decal to remove. The result was that the paint spray coated the inside of each hole white. Looking straight at the grill only a faint image could be seen. At any other viewing angle the image becomes more and more apparent. Kind of like those 3-d hologram cards.


This is viewing at it from about a 45 degree angle from the top.


Enough about the Grill. I cutting wells in the back side of the front plate for all of the controls using a 1 1/8" Forstner bit. Each Pot is about an inch in diameter and so are the switches.


Now it was time to glue it all together.


I added a few clamps. Time for breakfast.


Apr 8, 2012

Lunchbox Amp 1watt

This is a new build. This amp will be a lunchbox sized amp 8.75" wide x 6.75" tall with output in the 1-watt range. This amp I'm using Medium Density Fiberboard. I started out by making two acrylic templates on the laser cutter. Here I cut-out a bunch of boards just a little larger than the overall 8.75x6.75 size.

Here is the acrylic template for all of the amp except the very front piece. The front piece will have the speaker cutout. I drilled 4 holes near each corner to make the jig-saw work easier.


Not much to look at in this state.


Here is what it looked like with the template attached. I used a 1/2" flush-cut router bit with a top bearing. The bearing rides on the acrylic. That way each piece will be identical. I also drilled two 1/4 holes so I can add a dowel. This will help align each piece when I glue then together.


This is the Front Speaker Baffle. It just has a round hole for the speaker to mount in from the front. I also did a rabbit cut so the speaker will sit flush with the front wood face.


Added a few of the other pieces.


And with still others added. Eventually I will place 1/4" dowels in those alignment/locator holes at the top and bottom. Then glue each piece together.


1 Watt 12AU7 Output Tube Amp - Part II

Finished Painting the inside and front flat black. I cutout the Speaker Grill cover in the shape of Mickey Mouse since it is a very small amp.


Finished putting on Marshall Style Red Levant Tolex.


Added the corner protectors and also put some items in the picture to put the amp in scale to common objects.